Unlock Design: How to Learn Adobe Creative Suite
By Steven Van ·
A practical guide on how to learn Adobe Creative Suite. Discover a clear roadmap, expert tips, & real projects for Photoshop, Illustrator, & more.
So you’re ready to tackle the Adobe Creative Suite. The first thing you need to know is that you don’t have to memorize every single tool. That’s a surefire path to burnout.
The secret to learning Adobe’s massive software library is to start small. Think about a single goal, pick the one app that helps you achieve it, and then build a small project. This project-first mindset gives you immediate, practical experience and makes the whole process feel way less intimidating.
Where to Begin Your Creative Suite Journey
Staring at the list of over 20 distinct Adobe applications can be overwhelming. It’s a common feeling for aspiring creatives, and it's easy to get lost before you even start. But the key isn't to learn everything at once—it's to be strategic.
Your own creative goals are the only compass you need.
What are you trying to make?
- Eye-catching photos and social media graphics? Your journey begins with Photoshop.
- Scalable logos and detailed illustrations? Illustrator is your go-to tool.
- Multi-page brochures, magazines, or eBooks? You'll want to fire up InDesign.
- Engaging video content for YouTube or TikTok? Premiere Pro and After Effects are your power duo.
When you connect your goals to the right app, you create a clear starting line. Instead of trying to become a master of a dozen programs overnight, you can focus on just one.
Your Foundational Learning Roadmap
The best way to build a versatile skillset is to start with a strong foundation. For most designers, this means tackling the "big three" of static design: Photoshop, Illustrator, and InDesign. The skills you learn in one often transfer to the others, and mastering them prepares you for almost any visual communication task that comes your way.
Here is a simple but effective roadmap for your first few learning phases.
Your Core Adobe Apps Learning Roadmap
| Learning Phase | Application | Primary Use Case | Why Learn It Here |
|---|---|---|---|
| Phase 1 | Photoshop | Photo editing, raster graphics, digital painting | The industry standard for any pixel-based work. It’s the perfect entry point. |
| Phase 2 | Illustrator | Logos, icons, vector illustrations, infographics | Essential for creating graphics that can scale to any size without losing quality. |
| Phase 3 | InDesign | Layouts for print and digital (books, magazines) | The powerhouse for combining text and graphics into professional multi-page documents. |
This learning order establishes a logical progression, starting with pixel manipulation, moving to scalable vector art, and finishing with professional layout design.
The workflow is simple: Define your goal, choose the right application, and dive into a project.
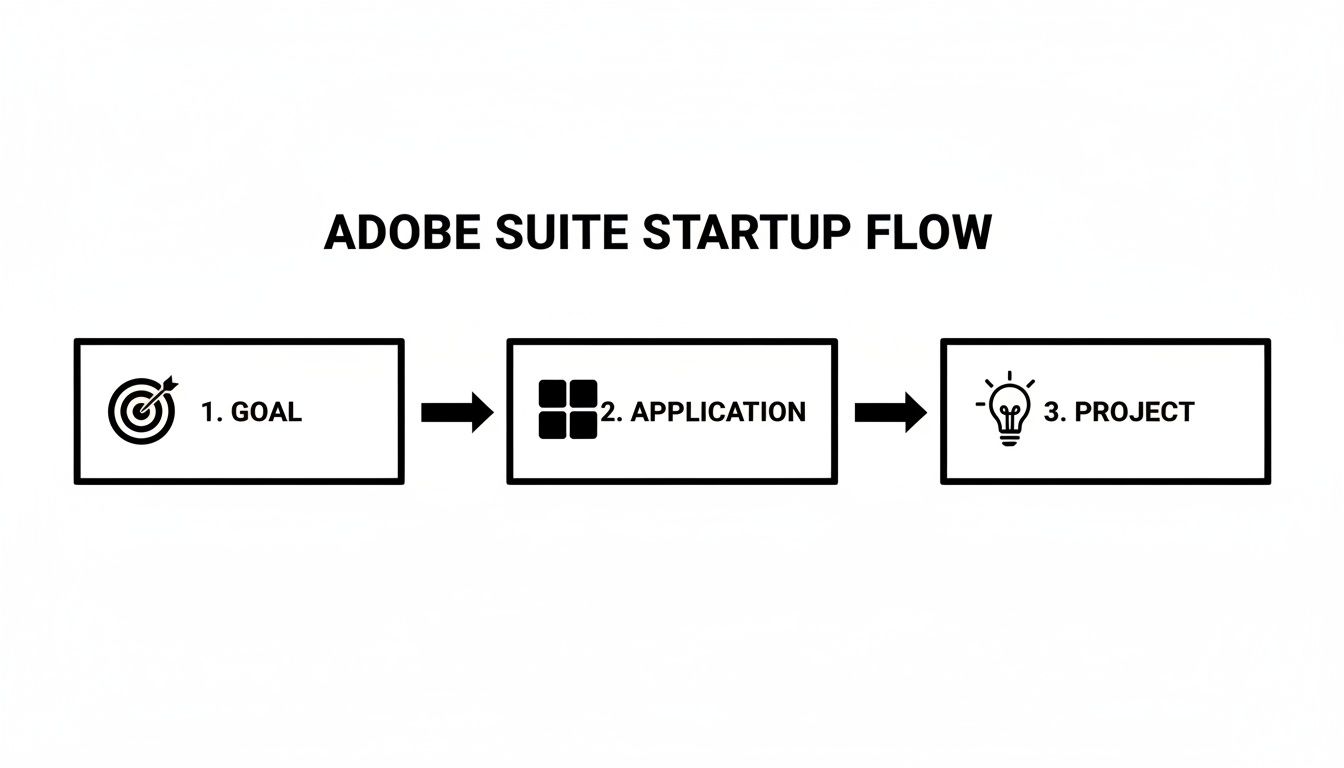
This method breaks a massive software suite into a series of manageable, goal-oriented steps. It's how you build momentum without getting discouraged. It’s also a smart career move—Adobe's platform is projected to grow to 41 million paid subscribers by 2026, making these skills more valuable than ever.
Learning the Creative Suite is about more than just software. You’re joining a global community. With platforms like Behance—which has over 29 million members—you gain instant access to a network for inspiration, feedback, and collaboration.
Getting started is an investment, but it's a critical one for any serious creative career. If you’re a student looking to make it more affordable, be sure to read our guide on the Adobe Creative Cloud student discount. This roadmap will simplify your first steps and make your entry into the world of professional design both effective and exciting.
Building Your Foundational Design Skills
Alright, you've got the map. Now it's time to actually start the journey. Theory is great, but real-world projects are where your skills get battle-tested and actually begin to stick. This is where we shift from watching tutorials to actively doing, focusing on the core features of Adobe's "big three" design apps.
We're going to tackle this with a project-based approach for Photoshop, Illustrator, and InDesign. The goal here is to build practical, portfolio-ready skills—not just memorize where the buttons are.
Your First Month Conquering Photoshop
There's a reason Photoshop is the undisputed king of raster graphics. It's the engine for photo manipulation, digital composites, and pixel-perfect web design. A perfect first project is creating a layered social media graphic, something you'll be asked to do again and again in any design role.
Here’s a rough four-week game plan to get you started:
- Week 1: The Workspace and Layers. Just get comfortable. Your only job this week is to poke around the interface, get a feel for the Layers panel, and try out basic tools like the Brush and Eraser. Don't aim for mastery; just build familiarity.
- Week 2: Selections and Masking. This is a non-negotiable Photoshop skill. Practice isolating objects with the Marquee, Lasso, and Magic Wand tools. Your goal is to use Layer Masks to cleanly cut things out from their background without destroying any pixels.
- Week 3: Adjustment Layers and Text. Now, let’s add some polish. Learn to use Adjustment Layers to tweak colors, brightness, and contrast non-destructively. Then, dive into the Type Tool to add and style some compelling text for your graphic.
- Week 4: The Final Project. Time to put it all together. Grab a stock photo, isolate the subject, pop it onto a new background, add a catchy headline, and export it for Instagram. Boom. You've just completed a real-world design task from start to finish.
This focus is vital. Photoshop is so ingrained in the industry that over 90% of creative professionals use it on a daily basis.
Adobe Photoshop alone captures roughly 42% of the global graphics software market, with Illustrator and InDesign also ranking in the top three. This dominance makes proficiency in the Creative Suite an absolute must-have for any serious design career. You'll find this backed up by most recent industry analyses.
Crafting a Logo with Illustrator
Next up is Illustrator, the home of vector graphics. Unlike Photoshop's pixels, vectors are built on math. That means you can scale them from the size of a postage stamp to a billboard with zero loss in quality, making Illustrator the go-to for logos, icons, and illustrations.
Your mission here is to design a simple, clean personal logo. To do this, you need to get friendly with two fundamental tools: the Pen Tool and the Shape Builder Tool.
The Pen Tool has a reputation for being tricky, but it’s worth the effort. It grants you absolute control over every line and curve. I recommend finding some online games or exercises designed to help you master its clicks and drags—they really work.
Then, you'll meet the Shape Builder Tool, which will quickly become your best friend for creating complex icons from simple shapes. Start by overlapping a few circles and rectangles. From there, use the Shape Builder to merge or subtract different parts to create a unique mark. Pair that with a great font, and you'll have a logo that looks surprisingly professional. If you want to go deeper, we have a detailed guide on using Adobe Illustrator.
Designing a Flyer with InDesign
With your photo editing and vector chops established, it's time to open InDesign. This is your layout and publishing powerhouse, the app where you’ll combine text and graphics into polished documents like brochures, magazines, and flyers.
For this project, you'll design a professional one-page flyer for a hypothetical event. This will force you to learn two crucial InDesign concepts:
- Master Pages: Think of these as templates inside your document. Any element you put on a Master Page—like a page number, a header, or a consistent background—automatically shows up on every regular page you apply it to. It’s a huge time-saver that ensures consistency.
- Text Flow and Styles: Learn how to pour text across columns and linked frames. More importantly, get a handle on Paragraph and Character Styles. These let you define looks for your headlines and body copy so you can update every single instance across a document with just one click.
By the end of this project, you'll understand the professional workflow of managing a document that pulls in the assets you made in Photoshop and Illustrator. Using each app for what it does best is the core secret to truly mastering the Adobe Creative Suite.
Alright, you’ve mastered the art of the still image with Photoshop, Illustrator, and InDesign. What's next? Making it all move.
Welcome to the world of motion graphics and video editing. If static design is about capturing a single moment, motion is about telling a story over time. This is where your designs come alive, and it's a skill that's in seriously high demand. Let's get you started.
The two big players you'll be meeting are Adobe Premiere Pro for video editing and After Effects for animation and visual effects. The best way to learn isn't by watching endless tutorials—it's by jumping in and getting your hands dirty. We'll walk through two projects that build directly on what you already know.
Your First Real Edit In Premiere Pro
Premiere Pro is the industry workhorse. It’s used to cut everything from quick social media ads to full-blown feature films. For your first project, you're going to create a 30-second promotional video.
This project will throw you right into the deep end—in a good way. It forces you to learn the fundamental workflow every single video editor relies on. You'll start by importing and organizing your media—all your video clips, photos, and audio files. From there, you'll get a feel for arranging everything on the timeline, trimming clips to just the right length, and piecing together a clear narrative.
As you start getting into editing, it's a good idea to get a lay of the land by understanding Adobe Premiere Pro and its alternatives. This context helps you appreciate why pros choose certain tools for specific jobs.
To get your promo video across the finish line, you'll also get familiar with:
- Working with Audio: You’ll learn to lay down a music track and mix the volume so it enhances the visuals instead of overpowering them.
- Basic Color Correction: We'll dip into the Lumetri Color panel to tweak the exposure and give your footage a consistent, professional look. It's amazing what a little color work can do.
- Simple Title Cards: You'll create clean, effective text overlays to get your message across.
By the time you're done, you'll have an actual video file, ready to share, and a solid grasp of the entire editing process from start to finish.
Animating Your Logo In After Effects
If Premiere Pro is for cutting video together, After Effects is where you breathe life into static graphics. This is the magic wand for animating logos, creating slick title sequences, and adding visual effects. Your mission here is simple: take that personal logo you designed in Illustrator and make it move.
This project is a fantastic introduction to the basic principles of animation. You'll import your Illustrator file directly into After Effects, which—and this is the beautiful part—gives you access to all the individual layers you created. It's a perfect showcase of how elegantly the Creative Suite apps work together.
The most powerful takeaway from learning the Adobe Creative Suite isn't just mastering one app, but understanding how they integrate. Importing a layered Photoshop file into After Effects to animate each element individually is a workflow that professionals use every single day. This is how you start thinking like a seasoned creative.
As you start making your logo move, you'll get comfortable with a few key ideas that are the foundation of all animation.
| Animation Concept | What It Is | Practical Application |
|---|---|---|
| Keyframes | These are just markers on your timeline that tell an object where to be and when. They define the start and end of any change. | You’ll set a keyframe for position at 0 seconds and another at 2 seconds to make your logo slide smoothly into the frame. |
| Easing | This is how you control the speed of the motion between keyframes to make it look natural and not so robotic. | Applying an "Easy Ease" will make your logo's movement feel smooth and professional, like it has real weight and momentum. |
| Text Animators | These are powerful built-in effects specifically for making text animate in cool ways without a ton of manual work. | You could use a "Typewriter" preset to have your tagline appear letter by letter right under your newly animated logo. |
This project-based approach makes learning motion design feel less like a chore and more like a creative discovery. It shows you that the skills you picked up in Illustrator aren't siloed; they're the building blocks for much more advanced work.
If you find yourself really enjoying the process, you can go even deeper with our resources on Adobe After Effects to really take your new animation skills to the next level.
Mastering Professional Workflows And Efficiency
You’ve put in the hours and built a solid foundation with the tools. The next leap forward isn't about learning another new feature—it's about fundamentally changing how you work. We're shifting from simply using the applications to making them an extension of your creative mind.
This is where you go from hobbyist to pro. It’s all about speed, efficiency, and weaving the entire suite into a single, seamless workflow. The goal is simple: spend less time hunting through menus and more time bringing your ideas to life.
Customize Your Digital Cockpit
Your first move toward true efficiency is to stop using the default "Essentials" workspace. Think of it as a generic rental car—it gets the job done, but it’s not yours. Every professional’s needs are different, and Adobe’s apps are built to be molded to your specific process.
In Photoshop, Illustrator, and InDesign, every single panel can be dragged, dropped, and resized. A photo editor might want their Layers, Adjustments, and History panels front and center. A layout designer, on the other hand, will live in the Pages, Paragraph Styles, and Links panels. Build the layout that puts your most-used tools an inch from your cursor.
Once you have a setup that feels right, save it immediately.
- Just go to Window > Workspace > New Workspace…
- Give it a name you’ll remember, like "Photo Editing Flow" or "Logo Design Setup."
This is a tiny action that has a massive impact on your daily productivity. It saves you from constantly rearranging your screen and lets you get into a creative flow state faster.
The Power of Keyboard Shortcuts
If there's one habit that screams "professional," it's the muscle memory of keyboard shortcuts. Relying on your mouse for every single action is a huge time sink. Committing shortcuts to memory is non-negotiable if you want to speed up your work.
Start with the universal basics that work across most of the Creative Suite:
- V for the Selection/Move Tool
- T for the Type Tool
- Z for the Zoom Tool
- Cmd/Ctrl + S to save your work (do it obsessively!)
After you’ve nailed those, start customizing. If you find yourself digging through menus for the same filter or command over and over, head to Edit > Keyboard Shortcuts and assign it a custom key combo. This is a total game-changer for any repetitive task.
A professional designer doesn't just know the software; they have a fluid, almost unconscious relationship with it. Personalizing your workspace and mastering shortcuts are the two most critical steps in building that fluency, turning the software into an extension of your own creative thoughts.
Unleash Advanced Time-Saving Features
Beyond just getting faster, you need to work smarter. Adobe has packed its apps with incredibly powerful features designed to automate tedious work and keep your projects perfectly consistent.
Here are three features you absolutely need to explore to work like a pro in 2026:
- Illustrator's Global Edits: Imagine you’ve used the same icon 20 times in a complex illustration. Instead of hunting down and updating each one by hand, Global Edit lets you change one instance, and Illustrator finds and updates all similar objects across your artboards. It’s a lifesaver.
- InDesign's GREP Styles: This is pure magic for long documents like reports or catalogs. You can write a rule that automatically finds and formats specific text patterns—like applying a character style to every phone number or product code in a 100-page document. It happens instantly.
- Photoshop's Generative Fill: This AI tool is perfect for the grunt work. It can remove distracting objects, extend backgrounds, and add elements with a simple text prompt. Use it to mock up concepts in seconds or clean up photos without hours of manual cloning.
To stay current, it's also smart to see how emerging tech can fit into your workflow. For example, you can speed up content creation by using AI Generated Images for Adobe Stocks to create mockups or background assets.
The Connected Workflow: A Real-World Scenario
Let's see how this all comes together. The real power of the Creative Suite isn't in any single app, but in how they talk to each other.
The Project: Design a logo, a business card, and a social media banner for a new client.
- The Logo: You start in Illustrator, the only choice for a scalable vector logo. You nail the design and save it as
logo.ai. - The Banner: Next, you jump into Photoshop to create the social media banner. But instead of just pasting the logo, you go to File > Place Linked… and select your
logo.aifile. This creates a Linked Smart Object. - The Business Card: Finally, you open InDesign to lay out the business card. Again, you place the exact same
logo.aifile as a linked asset.
Here comes the magic. The client emails back: "Love it! But can we see the logo in blue?"
Instead of a 30-minute fire drill, you simply open the original logo.ai file in Illustrator, change the color, and hit save. The moment you do, a notification pops up in both Photoshop and InDesign. With a single click to update in each app, the new blue logo appears instantly in your banner and on your business card.
This connected workflow saves time, prevents costly mistakes, and is the absolute standard for managing professional design projects.
Building A Portfolio That Gets You Hired
You’ve put in the hours, learned the tools, and churned out projects. So, what now? It's time to translate all that hard work into something that gets you paid. A solid portfolio is the single most important asset you have for landing a job or signing your first client.
Think of it this way: your portfolio isn't just a gallery of pretty pictures. It's a business proposal. It needs to tell a compelling story about your skills, your creative thinking, and your ability to solve real-world problems. Let’s get beyond just showing off your work and start building a narrative that actually gets you hired.
Curate Your Strongest Work
First rule: quality over quantity. Don't just dump everything you've ever made into your portfolio. Hiring managers are busy, and they'll only spend a few minutes looking at your work, so you need to make every piece count.
Your goal should be a tight, curated collection of 3-5 of your absolute best projects. Each one should act as a mini case study, highlighting a different skill or type of work. For example, your collection could feature:
- A full branding identity you developed, showcasing the logo you built in Illustrator.
- A social media campaign with eye-catching graphics you edited and composited in Photoshop.
- A multi-page magazine layout you designed and finalized in InDesign.
This approach shows you have high standards and a versatile skillset. It’s always better to show three incredible projects than ten that are just okay.
What you choose not to show is just as important as what you include. A curated portfolio signals to an employer that you have good judgment and a professional eye.
Go Beyond The Visuals With Case Studies
A great portfolio doesn't just show the finished product—it pulls back the curtain on how you got there. This is where a case study approach is a game-changer. Instead of just a title and an image, you'll walk the viewer through your process for each project.
For every project, craft a short story that answers these key questions:
- The Brief: What was the challenge or goal? Who was the client or audience? Even for a personal project, you can create a realistic, hypothetical brief to frame your work.
- Your Solution: How did you tackle the problem? Explain your thinking behind the color choices, typography, and layout. This is your opportunity to show you’re a strategic thinker, not just a button-pusher.
- The Tools: Which Adobe apps did you use, and why was each one the right choice for the job? Explaining that you used Illustrator for a scalable logo and Photoshop for photo manipulation shows you understand a professional workflow.
Writing these descriptions is a skill in itself. It proves you're a thoughtful problem-solver, which is exactly what employers and clients are desperate to find.
Choose The Right Platform
Where you showcase your work matters. While building a personal website is a great long-term goal, a platform like Behance is the perfect place to start. It’s owned by Adobe, so it’s deeply connected to the creative world and makes building beautiful project presentations incredibly simple.
Here’s why Behance is a smart move when you're starting out:
- Community and Discovery: It’s a massive social network for creatives. Recruiters and art directors are constantly scouting the platform, putting your work right where it needs to be seen.
- Easy to Build: You don't need to know how to code. The platform is designed to let you create rich case studies with text, images, and video using an intuitive interface.
- Adobe Integration: You can sync your projects directly from Creative Cloud apps, which really helps streamline your workflow.
Once you have a few solid case studies on Behance, you've got a powerful link to share. You can always build out a personal site later to serve as your central hub.
Seek Feedback and Find Opportunities
Your portfolio is never truly "done." It’s a living document that should evolve as your skills do. Get comfortable sharing your work with peers, mentors, or in online communities to get honest, constructive feedback.
Ask specific questions like, "Is the goal of this project clear?" or "Does this design feel right for the target audience?" This feedback loop is essential for spotting your blind spots and getting better at talking about your work.
As you polish your portfolio, start getting active in those same communities. A huge number of freelance gigs and entry-level jobs are found through networking and word-of-mouth, not just on giant job boards. This is how you start building connections and turn all that practice into a real, paying career.
Common Questions About Learning Adobe Creative Suite
Before you dive into learning the Adobe Creative Suite, you’re bound to have some questions. It’s a big commitment of both time and money, so let’s clear the air on a few things right away.
Getting these answers upfront helps set realistic goals and keeps you from getting discouraged when you inevitably hit a snag.
Which Adobe Creative Cloud Plan Should I Get As A Beginner?
This is a big one. For almost everyone starting out, the "All Apps" plan is the way to go. It gives you the freedom to experiment with everything from graphic design and video editing to web design without getting boxed into a single program. That freedom is gold when you're still figuring out what you actually enjoy.
Of course, if your budget is tight or you know exactly what you need, there are other solid choices.
- Photography Plan: A budget-friendly bundle that gives you Photoshop and Lightroom. It’s the perfect starting point for aspiring photographers and photo editors.
- Single App Plan: If you're 100% certain you only need one tool—like Illustrator to start a logo design business—this is the most direct route.
My advice? Take advantage of the 7-day free trial for the "All Apps" plan. You get to test-drive everything and see which apps you keep coming back to before you spend a dime.
How Long Does It Realistically Take To Get Proficient?
This is the million-dollar question, and the honest-to-goodness answer is: it really depends. How quickly you get good hinges on your goals, how much time you can put in, and whether you're actively creating.
To get comfortable with the core tools in a single app like Photoshop, plan for about 2-3 months of consistent practice, maybe 5-10 hours per week. That’s enough to handle basic projects and feel like you know your way around the interface.
To become truly "job-ready" with a solid grasp of 2-3 apps like Photoshop, Illustrator, and InDesign, you're looking at a 6-12 month journey of focused, project-based work. And mastery? That’s a lifelong pursuit. Even seasoned pros are always learning.
The real key is to make things. You'll learn infinitely more from building your own projects than from passively watching hours of tutorials.
Do I Need An Expensive Computer To Run Adobe Creative Cloud?
While a beast of a machine is always nice to have, you don’t need to break the bank to get started. Most modern computers from the last few years can handle the foundational apps just fine for learning.
Here are some general specs to aim for to keep things running smoothly:
- For Graphic Design (Photoshop, Illustrator): Look for a machine with at least 16GB of RAM, a decent multi-core processor, and a solid-state drive (SSD). An SSD is a game-changer for how fast apps and files open.
- For Video Editing (Premiere Pro, After Effects): This is where things get more demanding. You'll want 32GB of RAM or more, a fast processor, and a dedicated graphics card (GPU) with at least 4-6GB of VRAM.
It's always smart to check Adobe's official system requirements for the specific apps you'll be using. But seriously, don't let a mid-range computer be the reason you don't start.
Is It Better To Learn From Free Tutorials Or Paid Courses?
Both. It's not an either/or situation. The smart way to learn is to use both free tutorials and paid courses strategically.
Free resources, like you'd find all over YouTube, are amazing for solving a specific, immediate problem. If you’re stuck on "how to make a clipping mask in Photoshop," a quick video can get you unstuck in under five minutes.
Paid courses from platforms like LinkedIn Learning or Skillshare are different. They offer a structured, logical curriculum that takes you from the absolute basics to advanced skills in an organized way. You won’t get that from bouncing between random tutorials.
The best approach is a hybrid one: follow a structured course to build a strong foundation, and then use free tutorials to troubleshoot specific problems you run into while working on your own projects. You get the best of both worlds.
Ready to dive deeper and find the best tools for your creative journey? At Creators Toolbox, we curate the latest news, guides, and resources to help you succeed. Explore our platform and get the insights you need to grow your skills. Visit us at https://creatorstoolbox.com to get started.