How to Become UI Designer: how to become ui designer in 2026, A Practical Path
By Steven Van ·
Your practical guide on how to become ui designer in 2026: learn essential skills, tools, and portfolio strategies to launch your design career.
So, you’re thinking about becoming a UI designer? It's a great path, but it's less about a formal degree and more about building tangible, job-ready skills. The journey really boils down to four key areas: mastering design fundamentals, getting fluent with industry tools like Figma, building a solid portfolio, and connecting with other designers.
What a UI Designer Actually Does
Before we get into the nitty-gritty of how to become a UI designer, let's clear up what the job is all about. A User Interface (UI) designer is essentially the visual architect of a digital product. Every button you tap, every screen you swipe, and every icon you see—that’s the handiwork of a UI designer. Their job is to create interfaces that aren't just pretty, but also incredibly intuitive and easy to use.
The role often gets mentioned in the same breath as User Experience (UX) design, and while they're related, they aren't the same. Think of it like building a house: the UX designer is the architect who draws up the blueprints, planning the flow and layout of the rooms. The UI designer is the interior designer who picks out the paint colors, furniture, and lighting to make the space both functional and beautiful.
A Typical Day and Key Responsibilities
A day in the life of a UI designer is a mix of focused creative work and team collaboration. You'll spend a good chunk of your time taking low-fidelity wireframes (the basic sketches from the UX team) and transforming them into pixel-perfect, high-fidelity mockups.
This means creating consistent visual systems—defining the typography, color palettes, and component libraries that will be used across an entire app or website.
This simple roadmap breaks down the journey into four clear pillars.
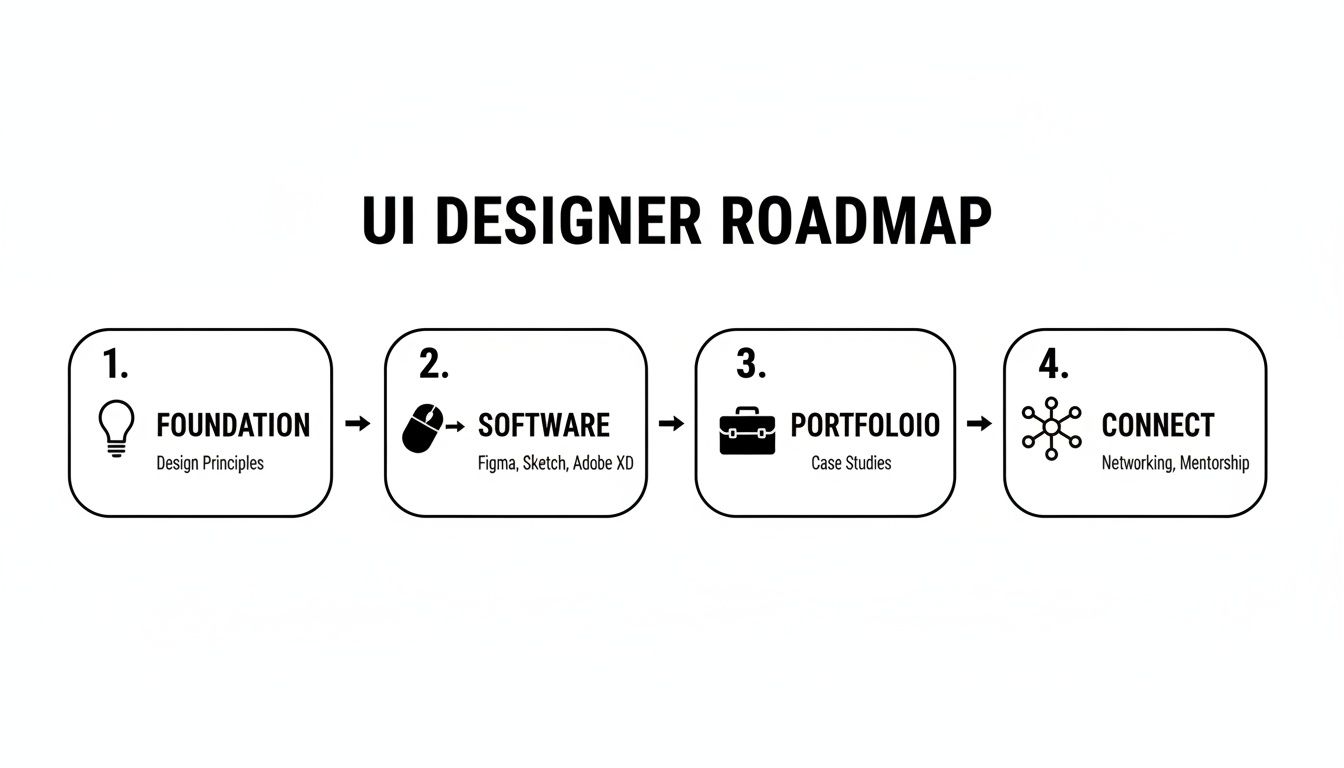
The career outlook is incredibly strong right now. Companies are realizing they've underinvested in design, and the demand is surging. In fact, recent data shows 82% of organizations have steady or growing design needs, with over a quarter seeing that demand jump by more than 25%.
To get you started, here’s a high-level look at the path ahead. This table breaks down the core pillars of your journey into a quick, actionable plan.
Your UI Designer Quick Start Roadmap
| Pillar | Key Focus | Recommended First Step |
|---|---|---|
| Foundation | Learning the core principles of visual and interaction design. | Start with an online course on UI/UX fundamentals to grasp concepts like color theory, typography, and layout. |
| Software | Gaining proficiency in industry-standard design tools. | Download Figma (it's free!) and follow beginner tutorials to learn the basic tools and interface. |
| Portfolio | Creating projects that demonstrate your skills to employers. | Complete one or two guided projects, like redesigning a small part of an existing app. |
| Connect | Building relationships and finding opportunities. | Join a design community on a platform like LinkedIn or Behance and start following experienced designers. |
This roadmap isn't just a checklist; it's a progressive journey that builds on itself, starting with knowledge and ending with real professional connections.
In essence, you are the person who ensures a product is visually coherent, accessible, and enjoyable to use. Your work directly impacts how users perceive and engage with a brand's digital presence, making it a critical role in any modern tech team.
Building Your Foundation with Essential UI Skills
Great UI design is more than just making pretty screens. It’s about creating an experience that feels intuitive, almost invisible. Before you ever touch advanced design tools or chase that first job, you have to nail the fundamentals. These are the core skills that separate professional work from something that just looks like a design.
Think of it this way: without understanding these principles, even the most powerful software is just a way to make a confusing mess. Mastering them is how you make deliberate choices that guide users, build trust, and create something people actually enjoy using.
Mastering Visual Hierarchy and Layout
The first thing anyone notices is the layout. An effective composition is what pulls a user’s eye from one element to the next in a way that just makes sense. This isn’t an accident—it’s done by strategically using grids, alignment, and white space.
Take a dashboard, for example. A good one uses a clear grid to organize information. The most critical numbers are probably bigger and placed where the eye naturally looks first (top-left for most Western audiences). Less important details are smaller and pushed further down the screen. It immediately creates a sense of order.
An interface should be so intuitive that it feels invisible. The user shouldn't have to think about where to click next—your design should guide them there effortlessly. This is the hallmark of great UI.
A critical part of this is white space, or negative space. It's not just "empty" space; it's an active design element that gives the interface room to breathe. Proper use of white space makes a screen feel less cluttered and more focused, which directly helps people understand what they’re looking at.
Understanding Color and Typography
Color is one of your most powerful tools. It sets a mood, defines a brand, and gives users instant feedback. Think about how we all instantly recognize red for an error or green for a success message. That’s a universal convention that provides immediate clarity.
But it goes deeper. A brand’s color palette can make a product feel energetic with bright oranges or calm and trustworthy with muted blues. Understanding the psychology behind color helps you make choices that actually support the product's goals.
Typography is the same deal—it's about way more than just picking a pretty font. Your goal is to create a clear typographic hierarchy that’s easy to read.
- Headings (H1, H2, H3): Need to be distinct in weight or size to give the content structure.
- Body Text: Must be super legible at smaller sizes so people can read comfortably.
- Captions and Labels: Can be smaller and lighter to show they're less important.
This structure helps users scan the content and find what they need without getting frustrated. A good rule of thumb when you’re starting out is to stick to just two font families—one for headings, one for body text. This keeps things consistent. The right pairing can define a brand's entire voice.
If you want to see how these principles come to life in a real tool, our Figma tutorial for beginners is a great place to start building out your own layouts.
Designing for Interaction and Accessibility
Static screens are a thing of the past. Modern UI is all about interaction design—how the interface responds when a user does something. This covers everything from how a button changes on hover to the slick animation you see when a menu slides out.
These tiny details, often called micro-interactions, make a massive difference. Think about the simple "pull-to-refresh" gesture on your phone. It’s a functional command, but it also gives you a little bit of satisfying visual feedback, making the whole experience feel better.
Finally, accessibility isn’t an afterthought. It's a non-negotiable part of the job. Designing for accessibility means you’re creating interfaces that everyone can use, including people with disabilities. The Web Content Accessibility Guidelines (WCAG) are the industry standard here.
Some key things you always need to consider are:
- Sufficient Color Contrast: Make sure your text is actually readable against its background.
- Keyboard Navigation: Allow people to get around your entire interface without needing a mouse.
- Screen Reader Compatibility: Ensure your design works with tools that read content out loud for visually impaired users.
By focusing on these skills, you’re not just learning to decorate screens. You're learning how to be a problem-solver who can create products that are both beautiful and fundamentally usable for everyone.
Mastering the Modern UI Designer's Toolkit
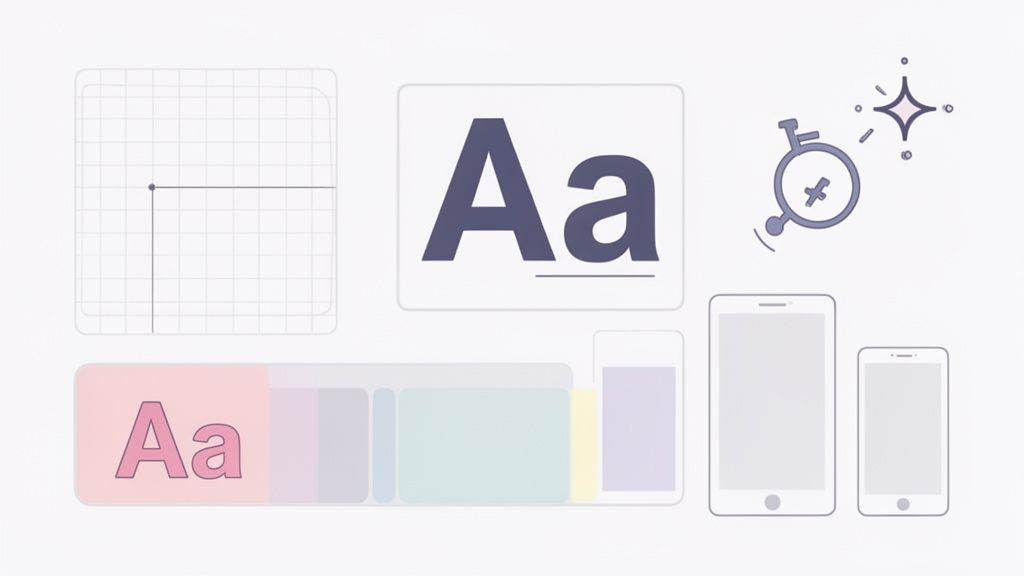
Knowing your design principles is one thing, but you also have to master the software that brings those ideas to life. Think of your design tools as your digital workshop—it’s where abstract concepts become tangible, interactive interfaces people can actually use.
In the world of UI design today, one tool has clearly pulled ahead of the pack: Figma. Its cloud-based, collaborative design has made it the standard for teams of all sizes. If you want to slot into a modern design team, getting really good at Figma is a must.
Why Figma Is King
Figma’s real power comes from its real-time collaboration. Imagine you and a developer working in the same file at the same time, or a project manager leaving comments directly on your mockup. This gets rid of the old, clunky process of exporting static images and emailing them back and forth.
But it’s more than just a great tool for teamwork. To really get good, there are two features you absolutely have to master: Components and Auto Layout.
Components: These are your reusable UI building blocks. Picture a button you’ve designed. You turn it into a component, and now you can reuse that exact button across dozens of screens. If a client asks to change the color, you just update the main component, and every single instance updates automatically. It’s a game-changer for consistency and saves a massive amount of time.
Auto Layout: This lets you build dynamic frames that grow or shrink as the content inside them changes. For instance, if you add more text to a button label, Auto Layout will automatically adjust the button’s padding and size to fit perfectly. This is the secret to building responsive designs that look great on any screen.
Mastering Figma isn’t just about learning where the buttons are. It’s about learning to think in systems—how components build a consistent design language and how Auto Layout makes your work flexible and scalable right from the start.
This move toward smarter tools is part of a bigger industry trend. To land a job, aspiring UI designers need a broad skillset. While research shows the job market is stabilizing, it’s still very competitive. Mastering tools like Figma, Adobe XD, and AI-powered workflows is crucial to stand out. You can learn more about these trends and what they mean for your career in this deep dive on the state of UX in 2026 from Nielsen Norman Group.
Comparing Core UI Design Tools
While Figma is the industry favorite, it's not the only tool out there. Knowing what else is available makes you a more well-rounded designer. Sketch and Adobe XD are the other big names, and each has its own unique strengths.
Here's a quick look at the top tools to help you decide where to focus your energy.
| Tool | Best For | Pricing Model | Key Feature |
|---|---|---|---|
| Figma | Real-time collaboration, web-based work, and all-around UI/UX design. | Freemium (a generous free tier and paid professional plans). | Best-in-class real-time collaboration and a huge community plugin library. |
| Adobe XD | Designers already working within the Adobe Creative Cloud ecosystem. | Subscription-based as part of Adobe Creative Cloud. | Seamless integration with other Adobe tools like Photoshop and Illustrator. |
| Sketch | Solo Mac users or teams who prefer a native macOS application. | Subscription-based, with older versions available for a one-time purchase. | A clean, focused interface and a long-standing reputation with tons of resources. |
For anyone just starting out, the choice is pretty clear: start with Figma. Its free version gives you everything you need to learn the ropes and build an entire portfolio.
As you get more advanced, you might find reasons to explore other software. If you're curious, we have a complete breakdown of the most popular UI design tools that goes into even more detail.
Supercharge Your Workflow with Other Tools
No professional UI designer works in a silo. Your toolkit should go beyond just one design application and include other software and plugins that make your process faster and your results more polished.
Adding these to your workflow will give you a serious edge.
- Plugins for Everything: Figma’s community is its superpower. You can find thousands of plugins that automate boring tasks, like Unsplash for adding placeholder images or Content Reel for populating your designs with realistic dummy text.
- AI-Assisted Design: New AI tools are popping up that can help with brainstorming, generating color palettes, or even creating initial layout ideas. They aren't here to replace you, but they are becoming powerful assistants.
- Advanced Prototyping: While Figma has solid built-in prototyping, specialized tools like ProtoPie let you create much more complex, high-fidelity interactions. For handing off designs to developers, tools like Zeplin can also help bridge the gap between design and code.
By focusing on Figma while staying aware of the broader ecosystem, you’re not just learning software. You're building a professional-grade workflow that will make you an effective and efficient UI designer from day one.
How To Build a UI Design Portfolio That Gets You Hired
Your portfolio is everything. It's not just a collection of nice-looking designs; it's your resume, your sales pitch, and your professional story all in one. This is where you prove you can actually do the job.
A great portfolio doesn't just show the finished product. It pulls back the curtain to reveal how you think and why you made certain decisions. It needs to be a set of compelling case studies that walks a hiring manager through your problem-solving process, from start to finish.
Quality Over Quantity Is Everything
Hiring managers are busy. They'd much rather see two or three well-documented, in-depth projects than a dozen half-baked ideas. Your job is to give them enough detail to understand your thought process without overwhelming them.
A classic rookie mistake is packing a portfolio with quick, surface-level projects just to make it look full. Instead, pour your energy into a few comprehensive case studies that showcase your full range of skills. Every project needs a clear beginning, middle, and end.
A portfolio isn't a gallery of your prettiest final screens. It’s a showcase of your ability to solve real problems. Show the messy sketches, the dead-end ideas, and the 'aha' moments. That’s what gets you noticed.
This approach shows you get it—that UI design is all about iteration and refinement. It proves you can tackle a complex problem, explore different paths, and land on a thoughtful, well-reasoned solution. If you're starting from scratch, our guide on how to create a portfolio that stands out is a great place to build your foundation.
Choosing Your First Projects
The most common question I hear from new designers is, "But I don't have any real-world projects!" You don't need any. The best entry-level portfolios are often built on self-initiated projects that highlight your passion and skills.
Here are three project ideas you can get started on right away:
The Redesign Project: Find a website or app—maybe for a local nonprofit or a small business you like—that could use a facelift. Pick something with a clear business goal, like increasing donations, driving more online orders, or getting users to stick around longer. Document the existing problems (use your own analysis or even ask a few friends for feedback) and then redesign the experience to solve those specific issues.
The New Feature Project: Grab an app you use every day, like Spotify, a fitness tracker, or a productivity tool, and design a new feature for it. This is a fantastic way to show you can think within an existing design system and brand identity, a skill every in-house designer needs. Define the user need for your feature and map out the entire user flow, from how someone finds it to how they complete the main task.
The "Scratch Your Own Itch" Project: Come up with a simple app or web tool that solves a frustration in your own life. This is your chance to really show off your product thinking and creativity. It could be anything: an app for organizing recipes, a tool to track your plant watering schedule, or a way to find local pickup basketball games. Since you are the target user, you already have deep insights into the problem.
Pick just one of these and see it through. A single, deeply explored project is far more valuable than five half-finished concepts.
How to Structure a Compelling Case Study
Once you've finished a project, you need to present it as a story. Every case study should guide the reader on a journey, showing them how you got from point A to point B.
Follow this simple structure for each project in your portfolio:
- Project Overview: A quick, punchy summary. What was the project and what was your role? What was the main goal you were trying to achieve? Keep it to just a few sentences.
- The Problem: Clearly state the problem you set out to solve. If you have data, use it. For example, "The local animal shelter's website had a 70% bounce rate on its donation page, and user feedback showed it was confusing to navigate."
- Research & Discovery: This is where you show your homework. Include things like user personas, a quick competitive analysis, or your initial napkin sketches. Most importantly, explain why you made key decisions based on what you learned here.
- Ideation & Wireframing: Show your low-fidelity wireframes. This proves you think about structure and user flow before you even think about color. It's powerful to show a few different versions to highlight your exploration process.
- Visual Design & Prototyping: Time to show off your polished, high-fidelity mockups. Briefly explain your choices for typography, color, and imagery. If you built a prototype, include a link to it or embed a short video of it in action.
- Outcomes & Reflection: What was the result? If it was a conceptual project, what metrics would you track to measure success? What did you learn along the way? This last part shows that you’re a designer who is focused on growth.
Choosing the Right Platform
So, where should this portfolio live? You have a few solid options, and each has its pros and cons.
| Platform | Pros | Cons |
|---|---|---|
| Personal Website | Complete creative freedom, looks highly professional, and lets you build a personal brand. | Takes more effort to build and maintain; may have hosting costs. |
| Behance | Huge built-in design community, simple to set up, and great for visual storytelling. | Less control over personal branding; templates can feel generic. |
| Dribbble | Excellent for showcasing quick visual snippets and getting noticed for your aesthetic style. | Not built for deep case studies; more about single "shots" than the full process. |
If you're serious about the job hunt, a personal website is the gold standard. But starting on a platform like Behance is a great way to get your work out there fast while you build your own site in the background. The most important thing is to just pick one and start. A portfolio is a living document—it will evolve and improve right alongside your skills.
Navigating The Job Market And Landing Your First Role
Alright, you've built a polished portfolio. Now comes the exciting part: turning all that hard work into a full-time UI design career. Think of the job search as your next big project. It's not just about sending out applications; it's about strategically designing your path to get hired.
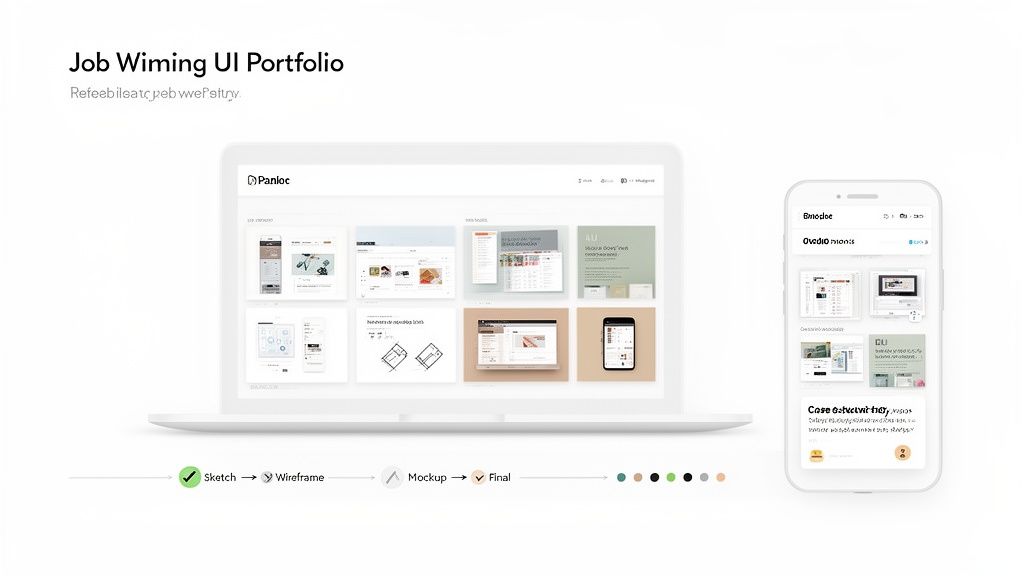
It's time to craft a résumé that gets noticed, network with intention, and walk into interviews prepared to shine. If you're switching fields entirely, the transition can feel massive, and a guide like this How to Change Careers: A Practical Roadmap can give you a solid framework to follow.
Crafting a UI-Focused Résumé
Your résumé isn't just a boring list of past jobs; it's a sales pitch for your skills. A hiring manager will likely spend only a few seconds on it, so it needs to scream "UI designer" from the very first glance.
Here’s how to make it work for you:
- Put your portfolio front and center. Your portfolio link should be impossible to miss. Place it right at the top with your name and contact info. It’s the first thing they want to see.
- Frame your work around results. Don't just list what you did. Describe the problems you solved in your portfolio projects. Use bullet points to highlight your process and the skills you applied.
- Add metrics when you can. Numbers catch the eye. Even on a concept project, you can frame it with impact. For example: "Redesigned a checkout flow to reduce steps from five to three, projected to increase conversion."
And forget what you've heard about needing multiple pages. For new designers, a sharp, clean, one-page résumé is almost always the better choice. It proves you can be concise and prioritize information—a core design skill.
Networking and Finding Opportunities
Hitting the "Apply Now" button over and over is rarely the most effective strategy. The best roles often come through people you know. Your goal is to build genuine connections, not just ask strangers for a job.
The most powerful networking happens when you're not asking for anything. Offer value, share your work, and engage in conversations. The opportunities will follow.
A great place to start is LinkedIn. Don't be a passive user. Follow design leaders you admire, leave thoughtful comments on their posts, and share your own work. When you do send a connection request, personalize it! Mention a project of theirs you liked or a post that made you think.
Platforms like Dribbble and Behance are more than just places to host your portfolio; they are active communities. Get involved. Liking and commenting on other designers' work is a simple way to get your name and profile in front of the very people who do the hiring.
Acing the Interview Process
If you’ve landed an interview, congratulations! Your portfolio and résumé did their job. Now you have to prove that you're the right person for the team. The UI design interview process usually happens in a few stages.
| Interview Stage | What to Expect | How to Prepare |
|---|---|---|
| Recruiter Screen | A short phone or video chat about your background, salary expectations, and why you want the job. | Have your "elevator pitch" down—a 30-second summary of who you are and what you bring to the table. |
| Portfolio Review | You'll meet with the hiring manager or design lead and walk them through 1-2 of your best case studies. | Practice presenting your projects out loud. Tell a story. Focus on your design process and decision-making. |
| Design Challenge | This could be a take-home assignment or a live whiteboard session to see how you solve problems on the fly. | For whiteboard challenges, talk through your thought process. The goal is to show how you think, not to deliver a perfect design. |
| Final/Team Fit | Chats with other team members, like developers or product managers, to gauge how you'd collaborate. | Prepare good questions about their workflow, team culture, and the relationship between design and engineering. |
Design challenges can feel stressful, but remember, the interviewers aren't looking for perfection. They want to see your problem-solving process in action. Always start by restating the problem and asking clarifying questions before you even think about sketching a solution.
Freelance vs. In-House: The Right Path for You
As a new UI designer, you generally have two main paths: working in-house for one company or going the freelance route. There’s no single "best" choice; it really depends on what you’re looking for.
An in-house role at a startup or a big tech company provides stability, mentorship, and a chance to work deeply on one product. You'll be part of a consistent team, learning how design operates within a larger business structure.
On the other hand, freelancing offers incredible flexibility and project variety. You are your own boss. This path is fantastic for building a diverse portfolio quickly, but it also means you’re in charge of finding clients and handling the business side of things. Many new freelancers start by taking on small projects for a low rate (or even for free) just to get those first testimonials and build a client list.
Your Questions About a UI Design Career Answered
Jumping into a new field like UI design naturally brings up some big questions. Let's tackle the most common ones I hear from aspiring designers so you can move forward with a clear, confident path.
Do I Need a Degree to Become a UI Designer?
Let's get this one out of the way, because it's a big one. The short answer is a resounding no, you do not need a traditional four-year degree to land a job as a UI designer. While some folks enter the field with a degree in graphic design or HCI (Human-Computer Interaction), it’s absolutely not a gatekeeper for most roles today.
Hiring managers are far more interested in what you can do. Your portfolio and practical skills are your currency. Can you demonstrate a solid grasp of design fundamentals? Are you proficient in essential tools like Figma? That’s what gets your foot in the door.
Most people get there through one of three routes:
- Bootcamps: These are intense, focused programs designed to get you job-ready quickly. They're great for structured learning and building an instant network.
- Self-Taught: This path is totally viable and much more budget-friendly, with endless online courses and free resources. It demands serious discipline but gives you complete flexibility.
- Formal Degree: A degree offers a deep theoretical foundation, which is a great bonus, but remember it isn't a substitute for a practical portfolio.
The right path is personal—it comes down to your learning style, budget, and timeline. No matter which you choose, the end goal is the same: building a killer portfolio.
Your portfolio is your degree. A strong set of case studies demonstrating your problem-solving skills will always be more valuable to an employer than a diploma.
How Much Math or Coding Do I Need to Know?
This is another source of unnecessary anxiety for many. Let’s clear it up: UI design does not require you to be a math genius. The job is about visual communication, empathy, and creativity, not complex calculations.
And what about coding? It's a "nice-to-have," not a "need-to-have." Your core responsibility is creating mockups and prototypes in design software, not writing production-level code.
That said, a basic understanding of HTML and CSS can be a huge leg up. It helps you have more productive conversations with developers because you're speaking their language. Knowing the basic building blocks of the web makes you a more practical and respected designer—you’ll design things that are actually feasible to build.
How Long Does It Realistically Take to Get a Job?
This timeline really depends on your learning path and, more importantly, how much focused effort you put into building projects.
Someone in a full-time bootcamp could be job-hunting in as little as 3-6 months. If you're teaching yourself part-time, a more realistic timeline is 6 months to 1.5 years. The biggest variable is always the time you dedicate to creating high-quality portfolio pieces.
Once you start applying, the job hunt itself can take another 3-6 months. It's a competitive field, and you'll need persistence. The key is to stay active, network on platforms like LinkedIn, and constantly iterate on your resume and portfolio based on the feedback you get.
At Creators Toolbox, we're committed to giving you the resources you need to succeed. Stay ahead of the curve with our weekly updates on the latest design tools, news, and tutorials. Check out our free guides at https://creatorstoolbox.com.