8 Essential Video Editing Tips for Beginners in 2026
By Steven Van ·
Master your craft with our top video editing tips for beginners. Learn about software, cuts, color, audio, and more to create professional videos today.
Jumping into video editing can feel like learning a new language. With countless software options, technical jargon, and a dizzying array of creative choices, it's easy to feel overwhelmed before you even make your first cut. But what if you could bypass the initial confusion and start creating polished, engaging videos right away? This guide is designed to do exactly that, providing a clear roadmap of actionable video editing tips for beginners. We're moving beyond generic advice to give you the specific techniques and workflow habits that professionals use to tell compelling stories.
This isn't just another list of abstract ideas. Each point is crafted to build a strong, practical foundation. You will learn how to:
- Select the right software for your needs.
- Organize your project files for an efficient workflow.
- Master essential cuts, like the J-cut and L-cut, for a smooth, cinematic feel.
- Apply basic color correction to make your footage pop.
- Optimize your export settings for high-quality results on any platform.
Whether you're an aspiring content creator, a small business owner making promotional videos, or someone who simply wants to improve their home movies, these insights will help you edit with confidence and purpose. Think of this as your foundational toolkit. By mastering these core principles, you'll not only avoid common beginner mistakes but also gain the skills needed to transform raw footage into a story worth watching. Let’s get started.
1. Start with the Right Software
Selecting your first video editing program is a foundational step that shapes your entire learning experience. The right tool should feel intuitive, not intimidating, allowing you to master fundamental skills without getting lost in a sea of complex features. To truly begin your journey, it's crucial to select the best software for editing videos that suits your needs and budget.
Beginner-friendly software strikes a delicate balance: it offers enough power to create professional-looking content while keeping the user interface clean and accessible. You don't need the most expensive program to learn core video editing tips for beginners; you need one that works for you.
Finding Your Perfect Match
Your content goals heavily influence which software is the best fit. A program designed for quick social media clips will have a different toolset than one built for cinematic filmmaking.
- For Social Media Creators (TikTok, YouTube Shorts): CapCut has become a dominant force due to its mobile-first design, trendy effects, and auto-captioning features. It's built for speed and vertical video formats.
- For Aspiring Filmmakers & Professionals: DaVinci Resolve offers a free version that is remarkably powerful, including industry-grade color correction, visual effects, and audio post-production modules. It has a steeper learning curve but provides immense room for growth.
- For Hobbyists & Mac Users: iMovie (free on all Apple devices) is an excellent starting point for creating personal projects, vlogs, and simple social content. Its streamlined interface makes it easy to assemble clips quickly.
Actionable Tips for Choosing Your Software
Before you commit, take the time to test your options. This initial investment of time will save you headaches later.
Key Insight: Don't choose software based on what professionals use; choose it based on what will make learning enjoyable for you. The best program is the one you will actually open and practice with.
Consider these steps to make a confident decision:
- Test Drive Everything: Always download the free trial or free version first. This ensures the program runs smoothly on your computer and that you find the interface manageable.
- Watch Specific Tutorials: Search YouTube for "DaVinci Resolve for beginners" or "CapCut basics." Seeing the software in action will give you a feel for its workflow.
- Check Community Support: Active user forums and Reddit communities are invaluable for troubleshooting and getting specific advice when you're stuck.
Exploring the various options, especially the many capable free versions, is a great first step. For a deeper look into no-cost options, you can find an excellent guide to the best free video editing software for beginners to help narrow your choices.
2. Master the Timeline and Timeline Navigation
The timeline is the heart of your video editing workspace. It’s the canvas where you arrange footage, layer audio, add graphics, and build your story from individual pieces. Gaining proficiency in timeline navigation is a non-negotiable step that separates frustrating editing sessions from fluid, creative ones.
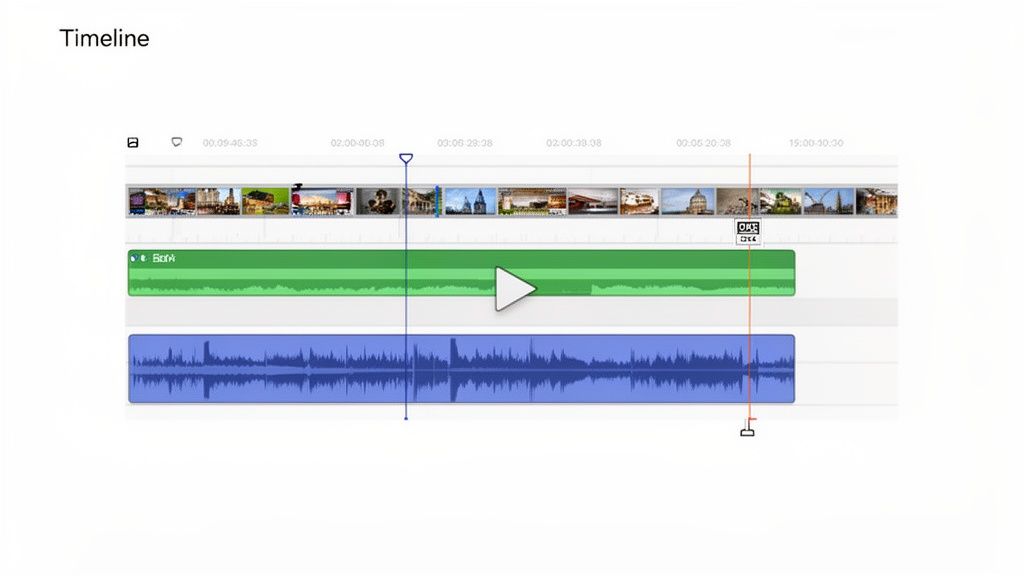
Efficient timeline control allows you to make precise adjustments, sync audio to video with frame-perfect accuracy, and manage complex projects without getting overwhelmed. This skill is a core part of any beginner's video editing journey, as it directly impacts your speed and the quality of your final output.
Building Your Project on the Timeline
Every type of video project relies on a well-organized timeline. The ability to manipulate clips, audio, and effects in a sequential or layered fashion is universal.
- For Fast-Paced Vlogs: A YouTube creator editing a vlog in Adobe Premiere Pro will constantly zoom in and out of the timeline to make quick jump cuts, align music beats with action, and layer sound effects.
- For Audio-Heavy Content: A podcast editor working in DaVinci Resolve’s Fairlight page uses the timeline to arrange multiple microphone tracks, cut out mistakes, and ensure speakers aren't talking over each other.
- For Short-Form Social Media: TikTok creators using CapCut rely on a simplified, touch-friendly timeline to quickly trim clips, add text overlays at specific moments, and sync everything to a trending audio track.
Actionable Tips for Timeline Efficiency
Getting comfortable with the timeline is about building muscle memory. The goal is to perform actions without having to think about them.
Key Insight: Treat your timeline like a physical workspace. Keep it clean, label your tools (tracks), and know where everything is. A messy timeline leads to a messy edit and wasted time.
Implement these practices to speed up your workflow:
- Learn Keyboard Shortcuts: Master the basics. Use
+and-to zoom, arrow keys to move frame by frame, and playback controls (J,K,L) to review footage without touching your mouse. - Color-Code Your Tracks: Assign specific colors to different content types. For example, make all A-roll video blue, B-roll green, music purple, and sound effects orange. This gives you an at-a-glance understanding of your project's structure.
- Use Markers: Place markers (
Min most software) on the timeline to flag important moments, note where a specific effect should start, or sync an action to a beat in the music. - Practice Zoom Control: Edit at different zoom levels. Zoom way in for frame-by-frame cuts and audio syncing. Zoom out to see the overall pacing and structure of your sequence.
3. Use J-Cuts and L-Cuts for Professional Transitions
Moving beyond simple hard cuts is a game-changer, and J-cuts and L-cuts are two of the most powerful techniques in your arsenal. These edits create a smoother, more engaging viewing experience by overlapping audio and video from adjacent clips. Mastering this fundamental skill is one of the key video editing tips for beginners that will immediately elevate the quality of your work.
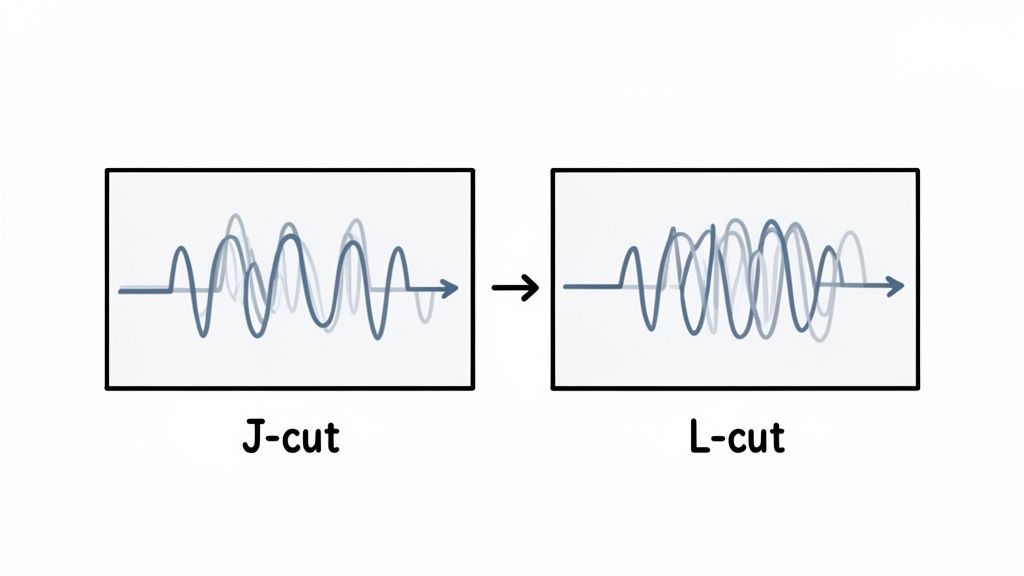
A J-cut is when the audio from the next clip (clip B) begins playing before the video from that clip appears. The audio track on the timeline forms a "J" shape. Conversely, an L-cut is when the video from the previous clip (clip A) continues to play over the audio from the new clip (clip B), forming an "L" shape on the timeline.
Finding Your Perfect Cut
These techniques serve distinct storytelling purposes and are used everywhere, from Hollywood films to YouTube tutorials. Knowing when to use each cut helps guide the audience's attention and emotion.
- For Introducing Context: A J-cut is perfect for setting up a new scene or idea. Imagine a documentary where you hear an expert's voice before you see them on screen; this prepares the viewer for the information to come.
- For Showing Reaction or Impact: An L-cut is excellent for emphasizing emotion or the consequences of an action. Think of a character delivering a dramatic line, and the camera lingers on another character's silent reaction as the dialogue ends.
- For Creating Smooth Conversations: Both cuts are essential for editing dialogue scenes. They make conversations feel natural by overlapping audio and cutting between speakers without jarring transitions.
Actionable Tips for Implementing J-Cuts and L-Cuts
Getting started with these cuts is simpler than it sounds. It requires detaching your audio and video tracks so you can manipulate them independently.
Key Insight: The purpose of a J-cut or L-cut is to create flow. The edit should feel invisible to the audience, drawing them deeper into the story rather than reminding them they are watching a video.
Follow these steps to practice and perfect your technique:
- Start Small: Begin with short overlaps of just one or two seconds. This helps you get a feel for the timing without overcomplicating the edit.
- Monitor Audio Levels: When audio from two clips overlaps, ensure the levels are balanced. You may need to fade one track out as the other fades in to avoid clashing sounds.
- Study the Pros: Pay close attention during movies or high-quality YouTube videos. Notice how editors use these cuts to guide conversations and transitions, and try to replicate those patterns in your own work.
- Match the Pace: A fast-paced action sequence might use very short, quick L-cuts, while a slow, thoughtful documentary might use longer, more deliberate J-cuts. Adjust the duration of the overlap to fit your project's rhythm.
4. Plan Your Project Structure Before Editing
The most time-consuming part of video editing often isn't the creative work; it's the frantic search for a specific clip or audio file. A well-organized project is the secret weapon of efficient editors, transforming a chaotic pile of media into a structured, manageable workflow. This upfront organization is a critical video editing tip for beginners because it saves immense time and prevents creative roadblocks.
Thinking like a filmmaker before you even open your software establishes a clear path from raw footage to final product. This pre-production mindset ensures your editing sessions are spent assembling your story, not just managing files.
Building Your Editing Blueprint
A clear structure prevents confusion and helps you focus on creativity. Professional production teams rely on shot lists and organized folders, and as a beginner, adopting this practice will immediately improve your process.
- For YouTubers: Scripting your video and then creating a "shot list" ensures you capture every necessary angle and piece of B-roll. When editing, you can check off each shot as you place it, guaranteeing nothing is missed.
- For Documentary Filmmakers: A detailed storyboard or scene-by-scene outline is essential. This plan guides how you organize hours of interviews and footage, allowing you to find the exact moment needed to tell a compelling story.
- For Event Videographers (Weddings, etc.): Organizing footage into folders by event segment (e.g., "Ceremony," "Speeches," "First Dance") makes assembling the final timeline logical and efficient.
Actionable Tips for Project Organization
A few minutes of setup before you import a single file will pay dividends throughout the editing process. This habit separates amateurs from aspiring professionals.
Key Insight: Your computer's file folders are your first editing tool. A clean, logical folder structure is the foundation of a smooth and stress-free project.
Follow these steps to build a solid foundation for every video you create:
- Create a Master Project Folder: Before you start, create one main folder for your entire project. Inside, make subfolders for
01_Footage,02_Audio,03_Graphics,04_Project_Files, and05_Exports. - Rename Your Files Systematically: Label your raw clips with useful information, such as
Date_Scene_Take_Camera(e.g.,2024-10-26_Interview_Take01_A-Cam). This makes searching for specific shots simple. - Back Up Everything First: Before you begin editing or renaming, create a complete backup of all your original media on a separate hard drive. Data loss is a devastating and preventable problem.
- Consider Using Proxies: If you are working with high-resolution 4K footage and your computer struggles, create proxy files. These are low-resolution copies that make your timeline run smoothly, and your software will switch back to the full-quality files for the final export.
5. Apply Cuts and Transitions Purposefully
Strategic use of cuts and transitions is what separates a polished edit from an amateur one. While it's tempting to explore every flashy transition in your software, professionals understand that the simplest choice is often the most powerful. These elements aren't just for decoration; they directly control the rhythm, pace, and emotional flow of your story.
Purposeful editing means every cut and transition serves a specific function. Mastering this skill is a core component of learning effective video editing tips for beginners, allowing you to guide the viewer’s attention and reinforce the narrative without causing distraction.
Finding Your Perfect Rhythm
The type of content you're creating dictates your transition strategy. A fast-paced music video requires a different approach than a serious documentary.
- For News & Informational Content: Hard cuts are king. They deliver information quickly and maintain a sense of urgency and authority, as seen in most news broadcasts.
- For Travel Vlogs & Montages: Dynamic transitions like whip pans or creative wipes can add energy and connect disparate locations, making the journey feel fluid and exciting.
- For Educational & Corporate Videos: Simple fades or dissolves work well to signify a change in topic or the passage of time without being jarring.
- For Emotional or Cinematic Scenes: A slow dissolve or a "fade to black" can create a powerful emotional beat, giving the audience a moment to absorb what just happened.
Actionable Tips for Purposeful Editing
Before adding a transition, always ask yourself: "Why am I using this here?" If the answer is "because it looks cool," consider a simpler alternative first.
Key Insight: The best transitions are the ones you don't notice. They should feel like a natural extension of the story, not an interruption. Use standard cuts for 80-90% of your edit to build a solid foundation.
Follow these steps to improve your use of cuts and transitions:
- Master the Hard Cut: The most common and versatile "transition" is no transition at all. A simple cut from one shot to the next is clean, efficient, and keeps the story moving.
- Reserve Fades and Dissolves: Use a fade-in/out to start or end a video or a major scene. Use a cross-dissolve to show a gentle passage of time or blend two related ideas.
- Match Transitions to the Beat: In music-driven content, time your cuts and transitions to align with the beat or key moments in the song to create a strong, rhythmic impact.
- Study the Pros: Pay close attention to how your favorite creators or filmmakers use transitions. Notice how often they just use a simple cut versus a more stylized effect.
6. Sync Audio and Video Properly
Few things scream "amateur" louder than audio and video that are out of sync. When a person's lips don't match their words, it creates a jarring effect that immediately pulls the viewer out of the experience. This synchronization is a foundational part of professional editing, and mastering it is a critical skill for any beginner looking to create polished, believable content.
Proper audio synchronization is critical for a professional-looking video. If your audio and video are recorded separately, it's essential to learn how to effectively synchronize audio and video flawlessly to avoid viewer distraction. Modern editing software gives you the tools to achieve perfect alignment, making this once-tedious task more accessible than ever.
When Synchronization is Essential
Syncing is not just for correcting mistakes; it is a core part of many production workflows where audio and video are captured on different devices for higher quality.
- Interview & Dialogue Scenes: When using an external microphone to capture crisp dialogue, you must sync it with the camera's video footage.
- Music Videos: Aligning the video cuts and artist performance precisely with the beats and lyrics of the master audio track is non-negotiable.
- Multi-Camera Shoots: In an event or interview filmed with multiple cameras, all video angles must be synchronized to the same master audio source to allow for seamless switching between them.
- Podcast Videos: Many podcasters record video on a camera and audio on a high-quality USB or XLR microphone, requiring the two files to be merged in post-production.
Actionable Tips for Perfect Sync
A systematic approach to syncing will save you significant time and prevent frustrating adjustments deep into your edit.
Key Insight: The best way to ensure good sync in post-production is to plan for it during production. A simple hand clap at the start of a take creates a powerful visual and audible reference point.
Follow these steps to keep your audio and video perfectly aligned:
- Use Automatic Sync First: Most editors like DaVinci Resolve and Premiere Pro have a built-in "Synchronize" feature. Select your video and external audio clips, right-click, and let the software analyze and align the audio waveforms for you.
- Visually Align Waveforms: If auto-sync fails, zoom in on your timeline and manually line up the audio waveforms. Look for a distinct, sharp peak, like a hand clap or a clapper slate, that is visible in both the camera audio and the external recorder's audio.
- Monitor with Headphones: Always wear headphones when checking sync. Your computer speakers might have a slight delay or lack the clarity needed to spot minor sync issues.
- Check Throughout the Edit: Don't just check the beginning. Scrub through your entire timeline, paying close attention to dialogue, to ensure the sync holds from start to finish. Sometimes, variable frame rates can cause audio to drift over time.
- Explore Audio Tools: For more complex audio work, dedicated tools can make a big difference. You can check out some of the most popular audio tools for creators to find solutions that fit your workflow.
7. Color Correction and Grading Fundamentals
Color is a powerful tool that transforms the mood and professional polish of your video. Neglecting it is one of the biggest mistakes beginners make. This process is split into two distinct stages: color correction, which is technical, and color grading, which is creative. Mastering the basics of both will make your footage look cohesive and intentional.
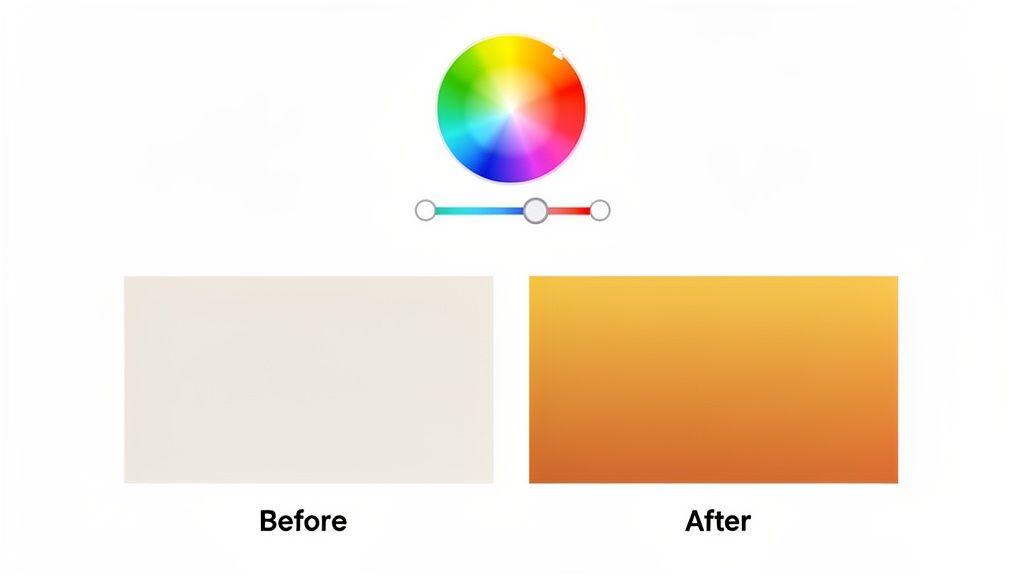
This distinction is a critical part of a solid workflow. Color correction fixes problems with exposure and white balance, creating a neutral and accurate starting point. Color grading applies a specific stylistic look on top of that corrected footage to evoke an emotion or a particular aesthetic.
Finding Your Visual Tone
The colors you choose directly influence how your audience feels. A warm, saturated look can feel comforting and nostalgic, while a cool, desaturated palette can create a sense of tension or drama.
- For Comfort & Lifestyle Content: Many YouTube creators apply warm, soft tones to make their vlogs feel inviting and personal. This often involves boosting the orange and yellow hues slightly.
- For Dramatic Storytelling: Documentary and cinematic creators might use desaturation or a cool blue tint to add weight and seriousness to a scene. The popular "orange and teal" look is used to make subjects pop from the background.
- For Travel & Adventure Vlogs: A key challenge is making footage from different locations and lighting conditions look consistent. Color correction is essential here to match shots, followed by a vibrant grade that makes the scenery pop.
This beginner-friendly tutorial provides a fantastic overview of the core concepts:
Actionable Tips for Better Color
Approaching color with a clear plan will prevent you from getting lost in the tools and creating an unnatural look.
Key Insight: Always correct before you grade. Applying a creative look to footage with an incorrect white balance will only amplify the original problem and lead to muddy, unprofessional results.
Follow these steps for a more controlled and effective color workflow:
- Correct First, Grade Second: Start by adjusting your white balance, exposure, and contrast to create a clean, neutral image. All clips should match this baseline before you add any style.
- Use Scopes, Not Just Your Eyes: Your eyes can be deceiving. Learn to read your software’s built-in video scopes (like the Waveform, Vectorscope, and Histogram) to make objective adjustments for true-to-life colors.
- Start with Subtle Adjustments: A little goes a long way. Over-saturating or pushing colors too far is a common beginner error. Make small, incremental changes and compare them to the original.
- Use LUTs as a Starting Point: Look-Up Tables (LUTs) are presets that apply a specific color grade. Apply one as a starting point, but always be prepared to tweak its intensity or adjust the underlying correction to fit your specific footage.
Getting comfortable with these tools is one of the most impactful video editing tips for beginners. To go deeper, you can explore the most popular color grading tools used by creators to achieve professional looks.
8. Export Settings and File Format Optimization
Your edit isn't truly finished until it’s exported correctly. Proper export settings are the final, critical step that determines how your video looks and performs on different platforms. This technical process prevents common beginner frustrations like pixelated footage, massive file sizes, slow uploads, and compatibility errors.
Optimizing your export ensures that your hard work translates into a high-quality viewing experience for your audience. Learning the basics of codecs, resolution, and bitrates is one of the most practical video editing tips for beginners, guaranteeing your content appears exactly as you intended, no matter where it's watched.
Finding the Right Export Recipe
Every platform has its own preferred video specifications. A file optimized for a cinema screen is completely different from one designed for a TikTok feed. Using the correct recipe is essential for quality and performance.
- For YouTube Creators: YouTube processes every video you upload, so providing it a high-quality file is key. Use the H.264 codec (often seen as .mp4), a resolution of at least 1080p (or 4K if you shot in it), and match your project's original frame rate.
- For Social Media (Instagram & TikTok): These platforms are built for vertical video. Export in a 9:16 aspect ratio (like 1080x1920) to fill the screen. Since these clips are often short, you can maintain high quality without creating excessively large files.
- For Archival & Professional Hand-off: If you need to save a master copy or send your project to another editor, a format like Apple ProRes offers much higher quality with less compression. The files are huge, but they preserve maximum detail for future edits or color grading.
Actionable Tips for Perfecting Your Exports
Before you hit that final "Render" button, a quick check of your settings can save you from having to re-export later. This small habit makes a big difference.
Key Insight: Don't guess your export settings. Most platforms publish official recommended upload specifications. A quick search for "YouTube recommended export settings" will give you the exact recipe you need.
Follow these steps to ensure a flawless export every time:
- Use Presets First: Most editing software includes built-in export presets for "YouTube 1080p," "Vimeo," or "Mobile Device." These are excellent, reliable starting points.
- Match Your Frame Rate: If you recorded your footage at 30 frames per second (fps), export it at 30 fps. Mismatching frame rates can cause stuttering or jerky motion.
- Choose the H.264 Codec: This is the universal standard for web video. It provides a great balance of quality and file size, ensuring your video will play on almost any device.
- Keep a Master Copy: Before exporting your compressed .mp4 for the web, consider exporting a high-quality "master" version (like a ProRes file). This is your digital original, which you can use to create other versions later without losing quality.
8 Essential Beginner Video Editing Tips Compared
| Item | Implementation Complexity 🔄 | Resource Requirements ⚡ | Expected Outcomes ⭐ | Ideal Use Cases 📊 | Key Advantages & Tips 💡 |
|---|---|---|---|---|---|
| Start with the Right Software | Low–Medium: easy setup; learning curve varies by app | Variable: runs on basic laptops to high-end workstations; free and paid options | High ⭐: faster onboarding and access to pro tools | Beginners, hobbyists, social creators | 💡 Try free trials, match features to content and hardware |
| Master the Timeline and Timeline Navigation | Medium: initial complexity but foundational skill | Low: standard multi-track editors; time to learn shortcuts | High ⭐: greatly improves speed and precision | Vlogs, multi-track edits, long-form projects | 💡 Learn shortcuts, color-code tracks, use markers |
| Use J-Cuts and L-Cuts for Professional Transitions | Low–Medium: conceptually simple; needs practice | Minimal: standard editing tools and reliable audio monitoring | High ⭐: smoother, more professional pacing | Interviews, documentaries, tutorials, narrative edits | 💡 Start with 1–3s overlaps; monitor and balance audio levels |
| Plan Your Project Structure Before Editing | Medium: upfront time investment for organization | Low–Moderate: spreadsheets, storyboards, backups, proxy files | High ⭐: reduces editing time and prevents rework | Large projects, collaborative shoots, scripted content | 💡 Create clear folders, label takes, keep backups and proxies |
| Apply Cuts and Transitions Purposefully | Low–Medium: easy tools but requires editorial judgment | Minimal: built-in transitions suffice; occasional plugins | High ⭐ when restrained; excessive use harms quality | News, music videos, vlogs—choose by genre tone | 💡 Use simple cuts 80–90% of the time; match transitions to mood |
| Sync Audio and Video Properly | Medium: automated tools help but verification needed | Moderate: headphones, sync tools, clapper/timecode, extra time | High ⭐: essential for professional, trustworthy output | Interviews, multi-cam shoots, music videos, podcasts | 💡 Use auto-sync then verify, record claps, check frame/sample rates |
| Color Correction and Grading Fundamentals | Medium–High: technical tools + creative decisions | Moderate: calibrated monitor, grading tools, LUTs/plugins | High ⭐: consistent look and enhanced emotional impact | Cinematic content, travel, branded videos, documentaries | 💡 Correct exposure/white balance first; apply subtle grading; test on devices |
| Export Settings and File Format Optimization | Medium: many technical choices and platform rules | Moderate: encoding time, storage for masters, knowledge of codecs | High ⭐: compatibility and optimal quality/file-size balance | Platform-specific delivery (YouTube, TikTok, Instagram), archives | 💡 Use platform presets, keep high-quality masters, match frame rate & codec |
Your Next Edit: Putting These Tips into Practice
You have just navigated a deep dive into foundational video editing techniques, and the journey from novice to confident creator is now clearly mapped out. This collection of video editing tips for beginners was designed not just to be read, but to be used. The real learning happens when you move from understanding a concept to applying it in your own timeline. You've seen how a well-organized project folder can save you hours of frustration and how the subtle timing of a J-cut can make a simple conversation feel more natural and engaging. These aren't just abstract rules; they are the practical mechanics of visual storytelling.
As you close this guide and open your editing software, avoid the pressure to implement everything at once. This can lead to creative paralysis. Instead, focus your energy on mastering one or two key areas in your very next project.
Your Immediate Action Plan
- For Your Next Edit: Before you import a single file, commit to building the project structure we outlined. Create dedicated folders for
RAW Footage,Audio,Graphics, andExports. This single habit will dramatically improve your workflow efficiency and prevent the dreaded "media offline" error. - Focus on the Cut: Instead of relying on flashy transitions, challenge yourself to build a sequence using only hard cuts and then refine it with deliberate J-cuts and L-cuts. Pay close attention to how this changes the rhythm and flow of your video. This exercise hones your sense of pacing, which is arguably the most critical skill for any editor.
- Audio is Half the Picture: Don’t treat audio as an afterthought. Once your visual sequence is locked, dedicate a focused block of time to cleaning up dialogue, balancing music levels, and adding subtle sound effects. Notice how a clean audio mix adds a layer of polish that viewers feel, even if they can’t pinpoint why.
Beyond the Basics: The Path Forward
The difference between a beginner's edit and a professional one often lies in intentionality. It's the difference between dropping a transition onto the timeline because it looks cool and choosing a specific cut because it serves the story. The tips covered here, from purposeful color correction to optimized export settings, are all about making deliberate, informed choices. Mastering these fundamentals gives you a solid foundation, allowing your creative instincts to flourish.
Your growth as a video editor is a process of continuous refinement. Each project is an opportunity to experiment and improve. Was your last edit's pacing a bit slow? Did the colors feel flat? Take those lessons and apply them to the next one. This iterative cycle of practice, critique, and improvement is the most effective way to advance your skills. The goal isn't just to assemble clips; it's to guide an audience's emotions, convey information clearly, and tell a story that resonates. By internalizing these core video editing tips for beginners, you are well on your way to doing just that.
Ready to take your skills further with industry-grade tools and assets? Creators Toolbox offers a massive library of templates, plugins, and professional presets designed to integrate seamlessly into your workflow. Explore our collection to find everything you need to add that extra layer of polish to your projects, from cinematic color LUTs to dynamic motion graphics. Find your next creative asset at Creators Toolbox.