Plan B-Roll That Explains What the Speaker Means
By Steven Van ·
Plan interview B-roll around evidence, context, process, and emotion, with a narration-to-shot map, honest demonstrations, fallbacks, and a review checklist.
AI-generated conceptual illustration; not a product screenshot, measured result, or factual diagram.
The speaker says the workshop changed its process. The picture shows someone walking through a doorway. The shot may be attractive, but the viewer still does not know what changed or why it matters.
Useful B-roll has a job. It can show evidence, establish context, explain a process, or support the emotional meaning of a moment. Those jobs sometimes overlap, but naming the main one makes a shot list more useful than a collection of camera angles.
This guide plans supporting footage for a fictional interview with the organizer of a community print workshop. The organizer explains how the team moved from informal verbal handoffs to a written proof-checking routine. The interview and production details below are invented examples. The method is intended to help you decide what to film, what to ask for, and what not to imply in the edit.
Begin with the meaning of the interview
Read the selected interview passage without thinking about coverage. Underline its concrete claims, unfamiliar terms, sequences of action, and emotional changes. These are the places where an image may help.
Our fictional organizer says: “We used to pass the job from person to person and assume the next person knew what had changed. Now the printer signs off on the marked proof before the run starts. It hasn't removed every mistake, but it gives us one version to work from.”
The passage contains a past process, a current process, a specific artifact, and an important limitation. The most tempting edit would show busy people, printing machinery, and a finished poster. The more informative edit would show the marked proof, the sign-off, and the relationship between that proof and the print run.
Keep the qualifier “It hasn't removed every mistake.” If the pictures imply a flawless system while the speaker describes a partial improvement, the edit becomes less accurate even though every individual shot is real.
Assign each proposed shot a purpose
Adobe's overview of B-roll footage describes its supporting role in establishing scenes and connecting an edit. The planning method here goes further by assigning each shot a specific explanatory purpose for this interview.
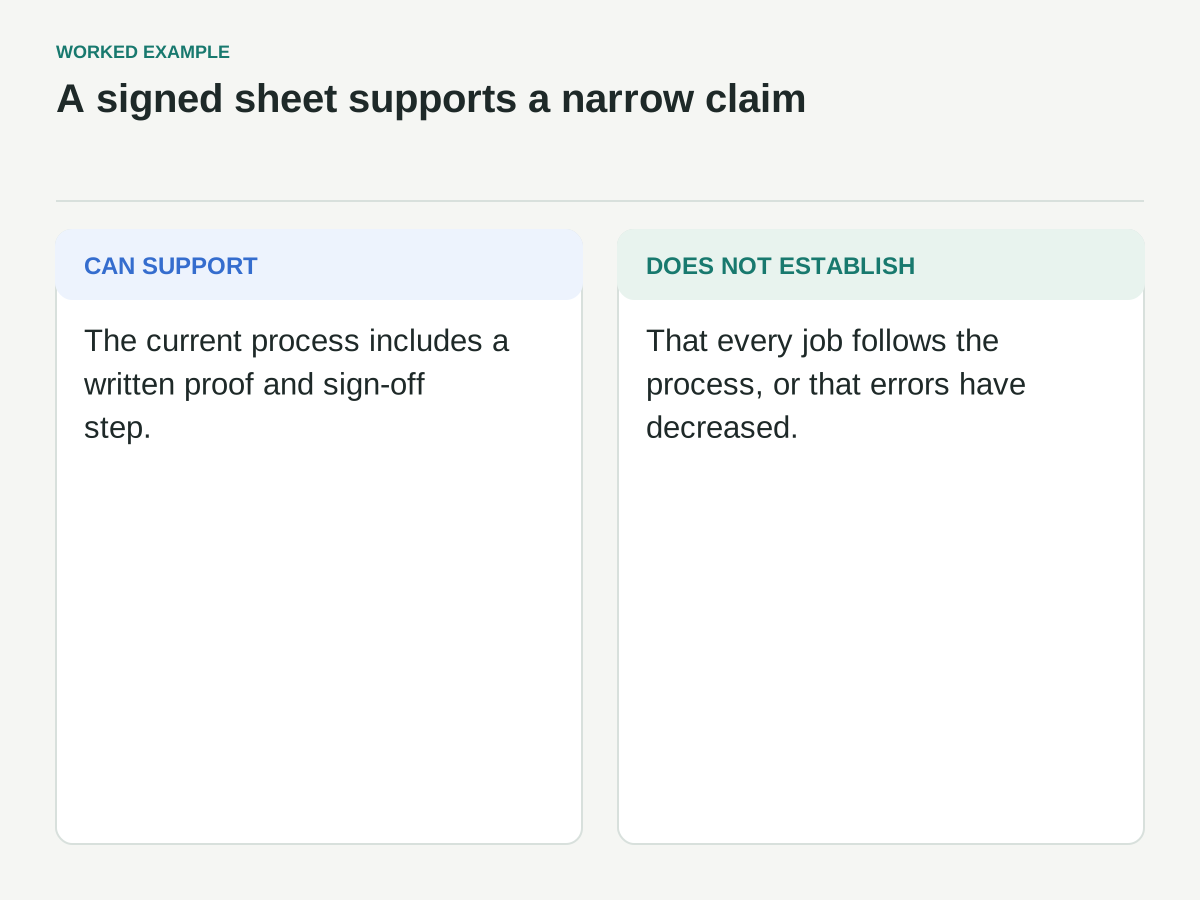
Evidence shots show something that bears on a claim. In the workshop example, the current proof sheet with a sign-off field can support the statement that the team uses a written approval step. It does not, by itself, prove that errors have decreased.
Context shots explain where the action happens and how the space is organized. A wide view can show the proofing table beside the printing area. That relationship helps the viewer understand why the handoff matters.
Process shots show an action or sequence. A volunteer compares a marked proof with the job sheet, checks a correction, and signs the approval field. The sequence answers “What do they actually do?”
Emotion shots support a person's experience without pretending to demonstrate a measurable result. The organizer pausing over an old marked proof may communicate care or frustration, but the edit should not label a neutral expression as an emotion the person never expressed.
Write one primary purpose next to every shot. If you cannot name it, the shot may still be useful as flexible coverage, but it should not displace a shot the story actually needs.
Build the narration-to-shot map
Split the selected passage into small units of meaning. Do not cut it into arbitrary three-second chunks. Each unit should contain a claim or idea the viewer needs to understand.
For “pass the job from person to person,” the ideal material might be an existing photograph or document that accurately shows the earlier workflow. If none exists, keep the speaker visible or use a neutral contextual shot. Do not film today's team acting confused and present it as historical evidence.
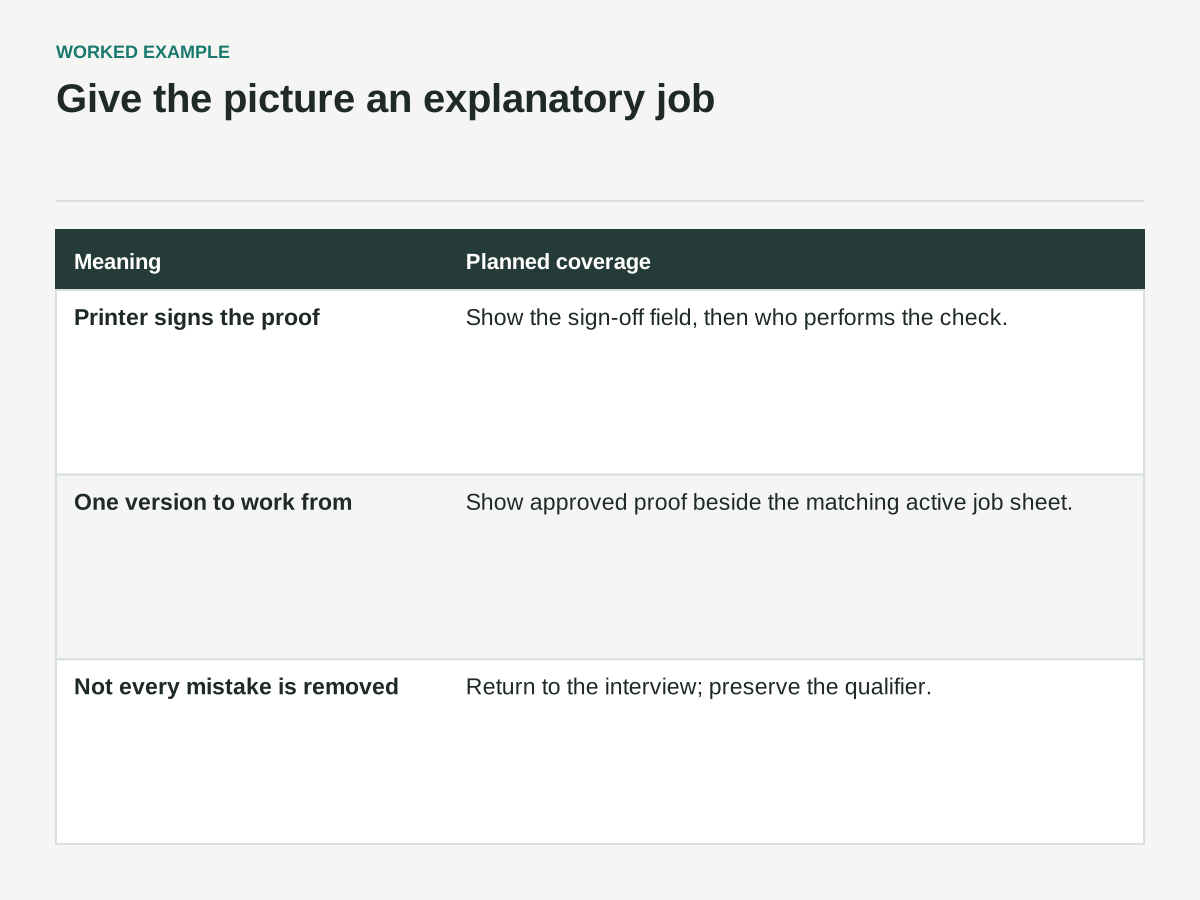
For “the printer signs off on the marked proof,” plan a close view of the proof with the sign-off area readable, followed by a medium view establishing who is doing the checking. The close shot provides information; the medium shot connects the action to a person and place.
For “one version to work from,” show the approved proof placed beside the active job sheet or workstation. The image should reveal the relationship, not just display a beautiful stack of finished prints.
For the limitation about mistakes, returning to the interview can be stronger than adding more machinery. A face can carry a thoughtful qualification without making an unsupported visual argument.
A filled meaning-to-shot map
These are fictional planned shots. No media filenames or recorded time ranges are claimed until the shoot supplies them.
| Interview meaning | Planned shot and purpose | Limit or fallback |
|---|---|---|
| Informal verbal handoff in the past | Keep organizer visible; add verified historical material only if available | Do not stage present-day confusion as historical evidence |
| Printer signs the marked proof | Readable sample proof and current sign-off action · evidence/process | Label a staged demonstration in the log; a signed sheet does not establish an error rate |
| One version to work from | Approved proof beside the active job sheet · context | Confirm the depicted documents actually belong to the same sample job |
| Not every mistake is removed | Return to the interview · limitation/emotion | Do not manufacture a distressed reaction or contradictory flawless-success montage |
The shot log should add captured file, verified time range, sound quality, restrictions, and whether the action was observed or demonstrated. Leave those fields pending during planning.
Distinguish observation from demonstration
A camera changes what is possible to capture. Some actions happen once; others can be repeated naturally. The planning question is whether a repeat changes the truth of what the audience sees.
If a volunteer demonstrates the current proof-checking procedure for the camera, record that in the shot log. A demonstration can be useful, but it should not be represented as footage of a particular historical incident. If the distinction matters to the story, make it clear in the finished piece.
Avoid asking someone to recreate distress, a mistake, or an argument solely to make the interview more dramatic. A neutral demonstration of a workflow is different from manufacturing evidence of a past event. When the real event was not filmed, use accurate documents, explanatory graphics, or the speaker's account rather than pretending otherwise.
Keep a column called “What this shot does not establish.” For the signed proof, write: “Does not prove all jobs follow the process or establish a reduction in errors.” This sounds cautious, but it is a practical editing aid. It prevents a visually persuasive shot from acquiring a claim it cannot support.
Plan complete actions instead of fragments
An editor needs the beginning, middle, and end of an action to choose where the sequence starts and stops. For the proof-checking scene, plan the volunteer approaching the table, placing the proof, checking the marked area, signing, and handing the approved sheet onward.
Capture a stable moment before and after each action where possible. The exact duration depends on the scene and the intended pacing; the point is to avoid starting the recording after the useful action has begun or stopping the instant it ends.
Use complementary views rather than several nearly identical close-ups. A wide shot establishes the workspace, a medium shot shows the relationship between person and task, and a detail shot reveals the mark or signature. You may not use all three, but they solve different editorial problems.
Do not sacrifice continuity to collect a checklist of angles. If the proof moves from the left side of the table to the right between views, note it. If a signature appears before the shot in which it is written, the sequence may need a different construction. Keep track of the state of the object as well as the camera position.
Capture sound as part of the explanation
Supporting footage is not only a visual layer. Paper moving across a table, a pencil marking a proof, or the printing press starting can help the sequence feel specific. Record useful natural sound when the location and permissions allow it.
Decide which sounds should remain under the interview and which deserve a moment of their own. A brief pause in narration can let the viewer understand an action before the speaker moves to its significance. Constant speech over constant motion can make an otherwise clear process feel rushed.
Avoid adding a dramatic machine sound that does not match the equipment shown. Sound can imply scale, speed, or danger just as pictures can. If you use library effects, choose and label them carefully in the project so later revisions do not mistake them for location recordings.
Capture a clean stretch of the location's background sound as well. It can help connect shots, but it is not a replacement for meaningful action sound. Keep those recording purposes separate in the shot list.
Prioritize when the location window is short
A shot list becomes useful on set when it distinguishes essential material from attractive extras. For this interview, the marked proof, the approval action, and the proof's relationship to the active job are essential. A sweeping exterior or a shelf of colorful inks is optional.
Group shots by location and participant to reduce unnecessary resets, then check that the grouping does not lose the sequence's logic. You can film efficiently while still preserving the editorial map.
Give each essential shot a fallback. If the printer is unavailable, could the organizer explain the sign-off field using a blank example form? If confidential client work cannot be shown, could the team demonstrate with a clearly identified sample job? If neither is possible, keep the speaker on screen rather than filling the gap with misleading stock footage.
Before filming readable documents, confirm what may appear. Client names, addresses, job prices, and unpublished artwork may not belong in the final video. Prepare a safe demonstration sheet rather than relying entirely on blur in post-production.
Log what the footage actually contains
After the shoot, update the plan with reality. A planned shot and a captured shot are different records. Note the file, useful time range, action, sound quality, visibility of important details, and any restrictions or contextual caveats.
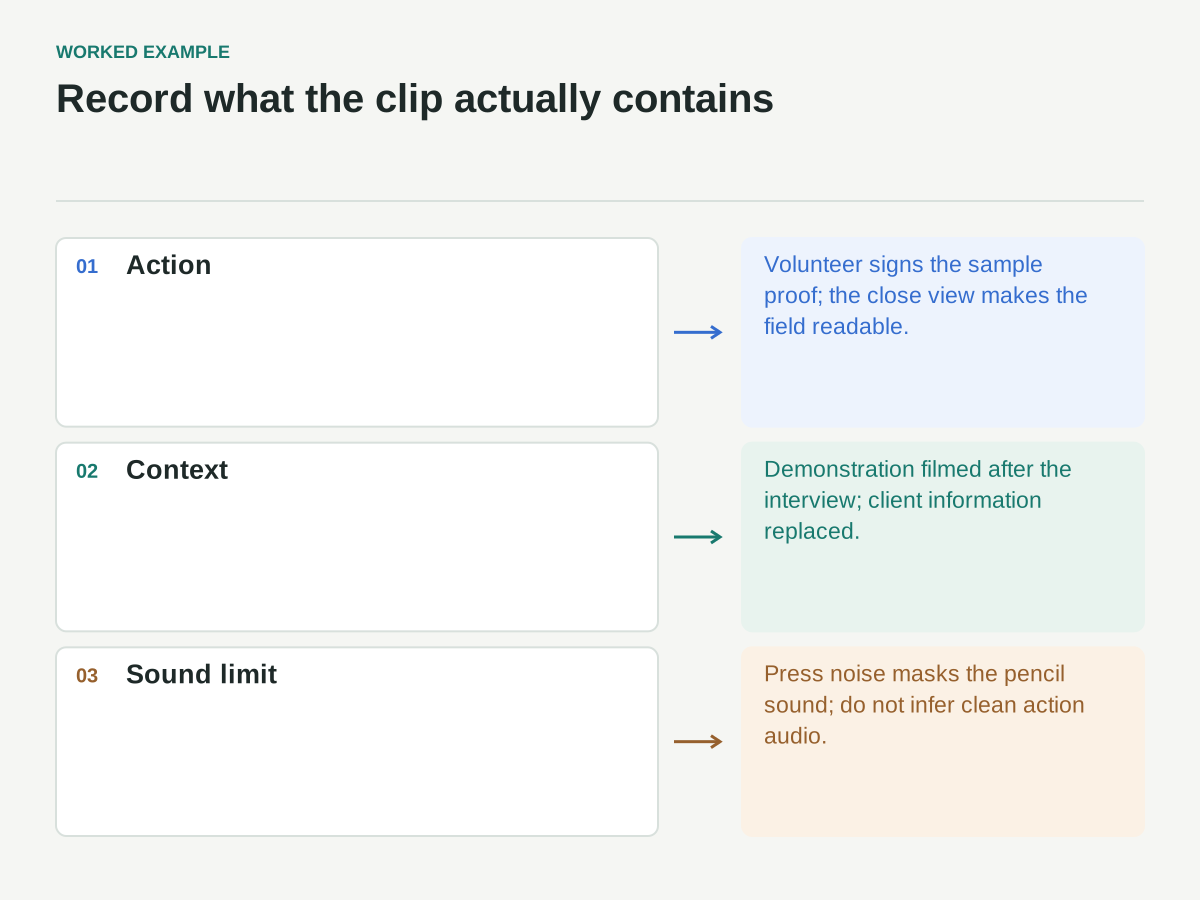
For example: “Clip P014, volunteer signs sample proof; demonstration filmed after interview; client information replaced; signature field readable in close view; press noise masks pencil sound.” That note helps an editor use the shot accurately without replaying the entire production history.
Tag footage by its explanatory role as well as its visual content. “Evidence: sign-off field” is more useful for this story than “close-up: paper.” Both tags can exist, but the first reconnects the clip to the reason it was filmed.
Do not label a shot “best” without explaining why. “Best readable proof detail” or “cleanest full action” survives a handoff better than a personal preference with no context.
Review the edit for meaning before beauty
Watch the assembled passage once without sound. What does the visual sequence appear to claim? Then listen without picture. Does the interview make the same argument? Differences reveal where the imagery may be adding an unsupported conclusion.
Next, review every supporting shot against four questions:
- What does this image help the viewer understand at this exact moment?
- Does it match the time, place, and process the narration describes?
- Could a reasonable viewer infer something stronger than the evidence supports?
- Would staying on the speaker be clearer?
A shot can be beautiful and still be the wrong choice. A simple view of a marked proof may carry more information than a dramatic shot of machinery. Likewise, the best B-roll plan sometimes leaves a deliberate gap because the speaker's face is the most honest image for the moment.
The finished shot board should connect narration, purpose, planned coverage, fallback, and captured material. That structure turns B-roll from decorative insurance into a set of editorial decisions. You are not merely hiding cuts; you are helping the audience see what the speaker means.